Guide to setting up VLANs for Printing with Firewall isolation
This guide focuses on setting up a basic VLAN to get people started. For other initial device configurations, please refer to other parts of the Peplink forum.
Step 1: Set up your unit within InControl2
Follow this guide on setting your equipment up in InControl2, as everything I’ll take you through will be based on that
Step 2: Create your required VLANs within InControl2
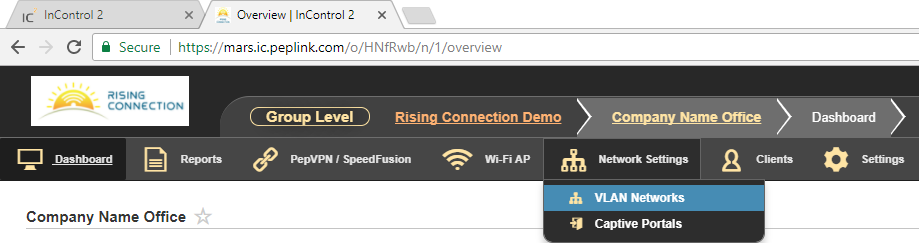
Navigate to your organisation’s group and choose the drop-down menu under network settings of “VLAN Networks”
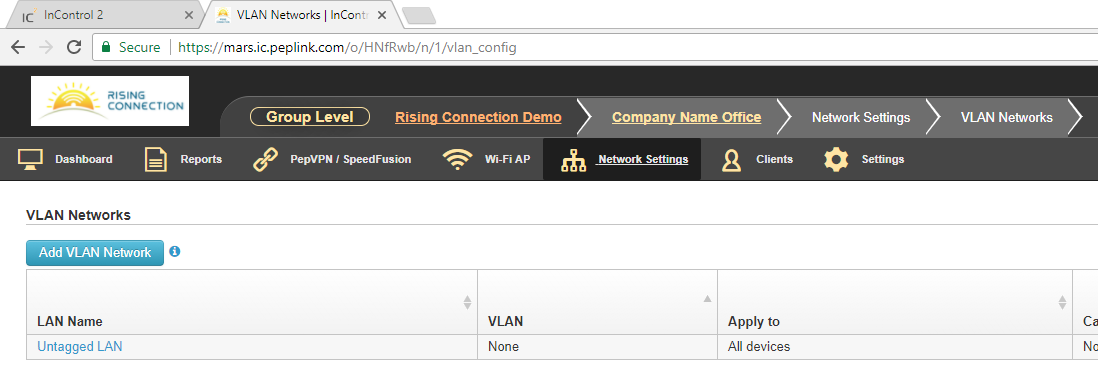
Select the button “Add VLAN Network”
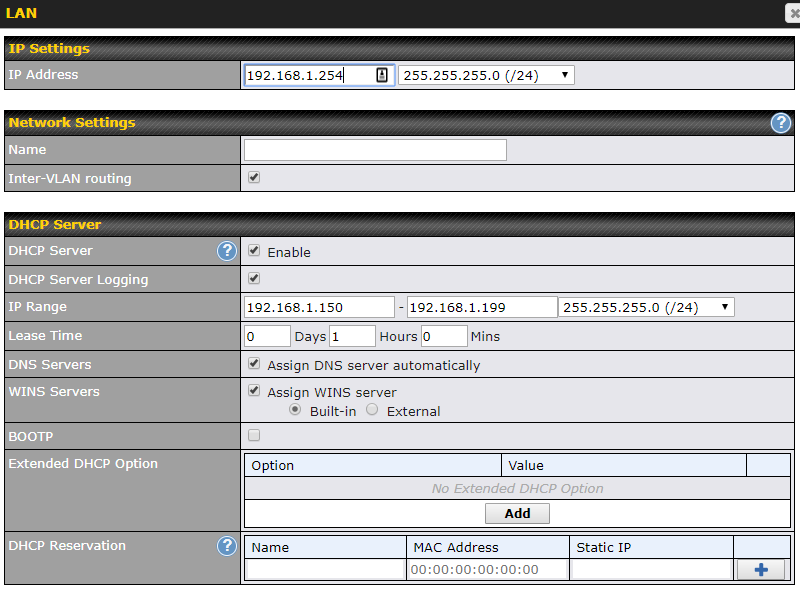
Enter your VLAN settings and tick ON “Inter-VLAN Routing” before pressing save

You should now see something like this

Step #3: Navigate to the Network settings on your device
You can do this in either of two ways
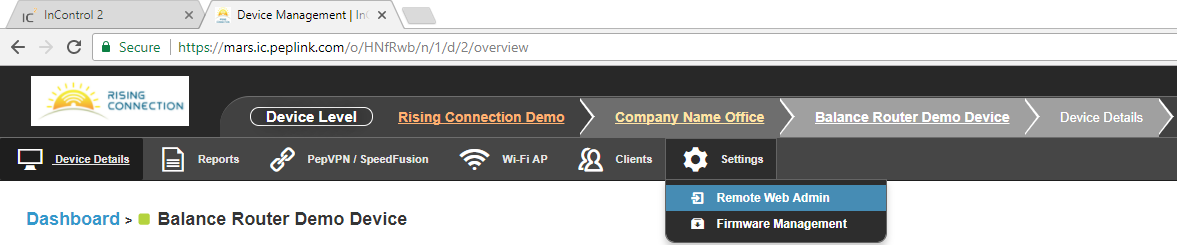
- Remotely by using the secure InControl2 remote web admin
Navigate to your device’s Dashboard and under the Settings menu, choose “Remote Web Admin”
- Locally, we are going to the router’s local IP address (remember that if you have configured the security from InControl2, you will need to get the password from the device page for InControl2)
In your browser, type the local IP address of your device, such as https://###.###.###.### and log in
On the Network Menu (this differs slightly between Models), navigate to “Network Setting”. Your browser should look something like this.

Check that your VLANs are in place and the Inter-VLAN routing is enabled (other settings are for example only, change to match your requirements)
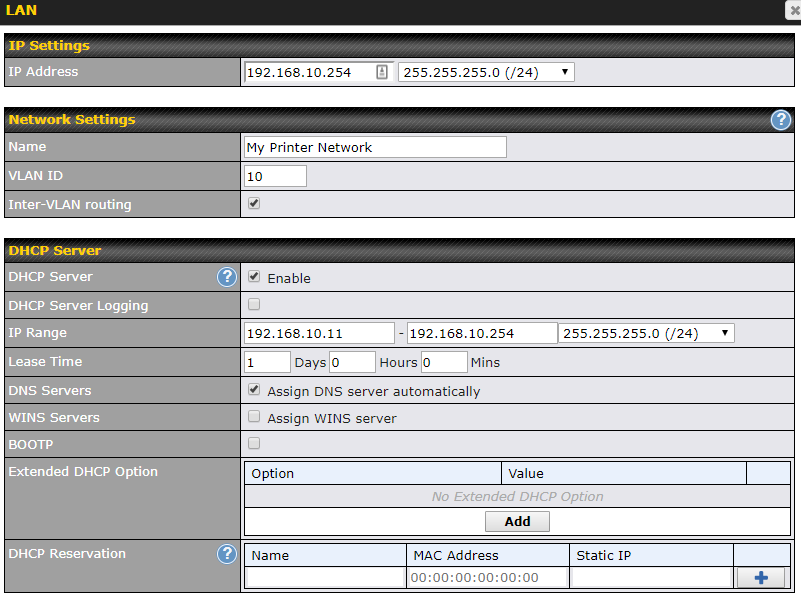
Step 4: Create your firewall rules
Navigate to the Firewall “Access Rules”, on a Balance router this will be in the “Network” menu, on a MAX router this will be in the “Advanced” menu

To block your new Printer VLAN from accessing the Internet, create an “Outbound Firewall Rules” by selecting “Add Rule” and adding in the required details, like in this example, and select save
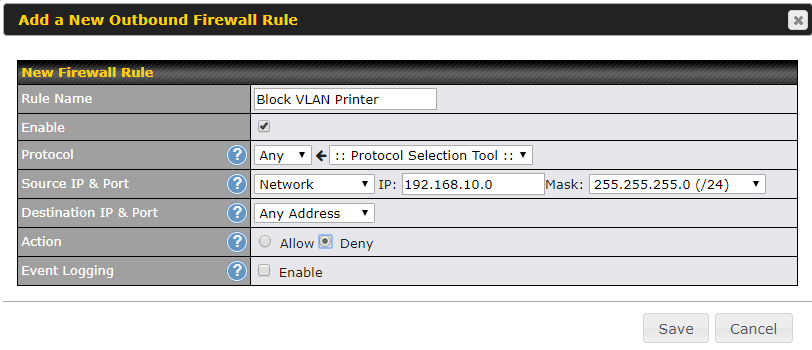
The screen should now look something like this

To restrict access out of your Printer VLAN to other VLANs, create an “Internal Network Firewall Rules” by “Add Rule” and add in the required details, like in this example, and select save
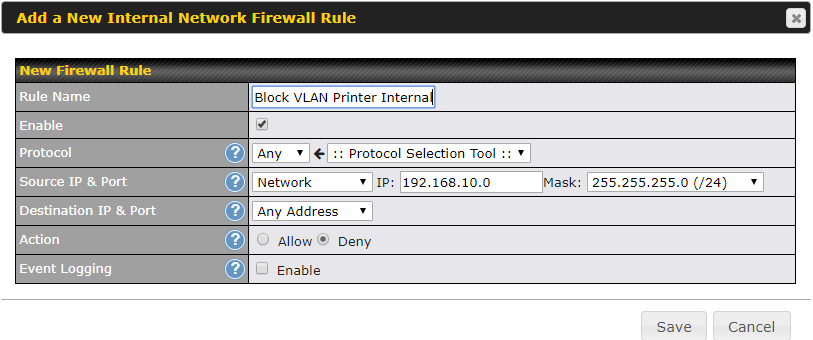
The screen should now look something like this
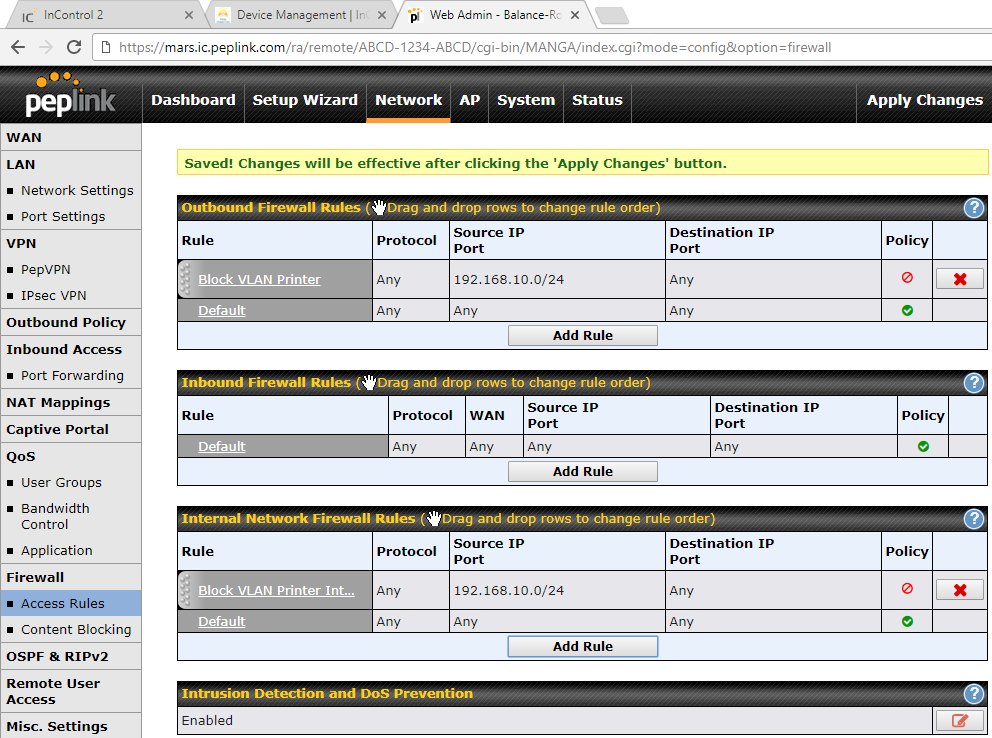
Step 5: Assign VLANs to the device’s ports
Navigate to the LAN Port Settings. It will look similar to this

Pick a port and change its “Port Type” from Trunk to Access, change the corresponding VLAN to your Printer Network, and press Save

The screen should now look something like this
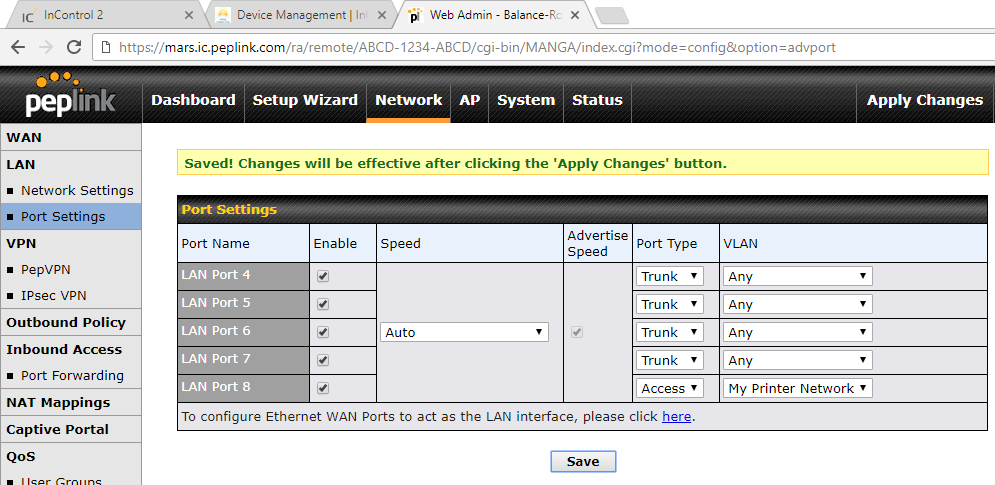
Now press “Apply Changes”, and then plug your Printer into the port assigned for it.
Happy to Help,
Marcus 