Outbound Policy for SpeedFusion
Multiple SpeedFusion Tunnels Between two Locations
One of the new features from Firmware 7 onward is the ability to create outbound policies within a PepVPN or SpeedFusion tunnel (further referred to as SF tunnels in this document).
With this feature, you have even more control over the way your network traffic is prioritized and routed.
Until now you could create one SF tunnel to a remote location, but with this new feature you can essentially create up to 5 SF tunnels from your Peplink router to the same remote location, each with different behavior.
This allows you to enforce or prioritize certain kinds of traffic over your preferred WAN connection WITHIN your SF profile.
Steps to enable
To enable this feature, go to Network > PepVPN or (Network > SpeedFusion) and create a new SF profile or open an existing profile.
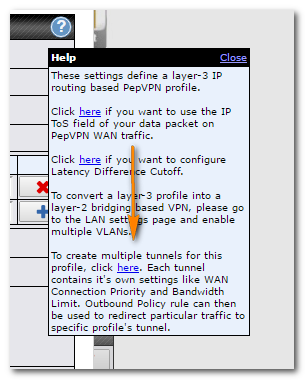
Click on the help function (question mark) in the top right corner and then select the link to create multiple tunnels for a SF profile.

You can then create up to five tunnels within that same SF profile.
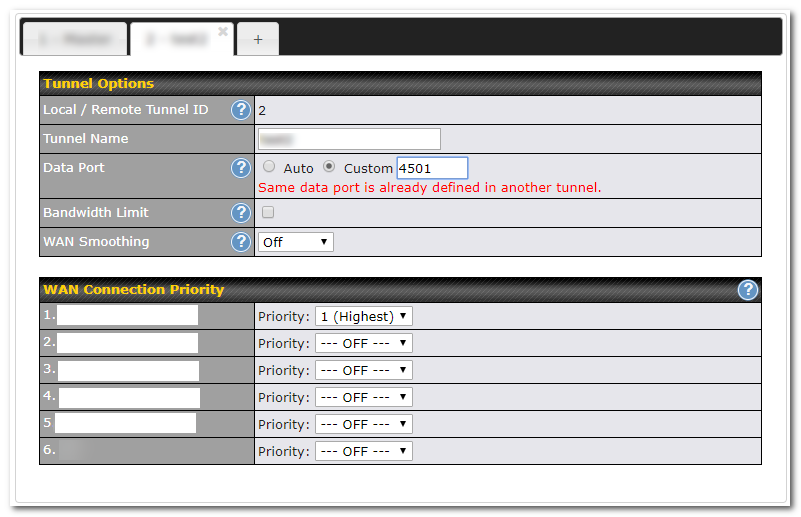
You can assign different WAN connections, select different priorities, enable or disable WAN Smoothing and set a Bandwidth limit for each tunnel."
In the example below there are two new SF tunnels.
Tunnel 1: Using both WAN1 and WAN2
Tunnel 2: Using WAN1 only
Tunnel 3: Using WAN 2 only
Just like the SpeedFusion connection you are familiar with; after the tunnels are created on your local device, the same tunnels need to be created on the remote device.
To control which kind of traffic goes through which SF tunnels, you can create outbound policies and assign them to one or more of these newly created tunnels.
Open Network > Outbound Policy then click on the question mark in the rules section to turn on Expert Mode and apply the changes.
Add a new rule and select “PepVPN Network”, then choose your “new SF tunnel” as the destination.
Like any other Outbound Policy, you can now select which source IP Address, IP Network or Mac Address is associated with a certain policy.
You can also select any available Algorithms to further control your dataflow.
Only “priority” and “enforced” algorithms currently support a PepVPN network on the outbound interface, but you can now select one or more of the SF tunnel(s) to that location, giving you the possibility to route certain traffic within the SF tunnel over a WAN connection of choice.
Use Cases
-
Prioritize your VoIP or VIDEO traffic over your most stable WAN connection or the connection with the lowest latency, while other (less important) traffic still flows through the SF tunnels over your less reliable WAN connections.
-
Turn WAN smoothing on for certain types of traffic
-
Set bandwidth limits for certain types of traffic WITHIN your SF tunnel.
Disclaimer
-
This function is not compatible with layer 2 PepVPN / SpeedFusion profiles (Coming in FW 8.0!)
-
Route information is only available on the main SF tunnel to a certain destination; additional tunnels to that same destination act independently.
-
When using multiple tunnels; multiple ports are in use (1 for each-subprofile).
The UDP data ports used when using (N number of sub-profiles) are:
4500…4500+N-1, or (when port 4500 is in use by IPSEC or L2TP) 32015… 32015+N-1
These ports are assigned automatically; when using custom ports you’ll see a warning if a port is already being used:
- For more information on ports used by Speedfusion, see: Configuring SpeedFusion behind a firewall


