This guide covers configuration of IPSEC between Peplink and Juniper SSG firewall using X.509 authentication. The example assumes the following settings:
IPSEC VPN Settings
Peplink WAN IP Address: 210.211.10.5 Peplink LAN Network: 192.168.2.0/24 Peplink Certificate: Email: [email protected] Juniper SSG WAN IP Address: 66.80.3.1 Juniper SSG LAN Network: 192.168.1.0/24 Juniper Certificate: Email: [email protected] IPSEC Phase 1 Authentication: SHA-1 ISPEC Phase 1 Encryption: AES-128 ISPEC Phase 1 DH Group: 2 IPSEC Phase 2 Authentication: SHA-1 ISPEC Phase 2 Encryption: AES-128 ISPEC Phase 2 PFS Group: 2Configure Peplink device for X.509 authentication
The Peplink should have its own private key and certificate installed to use X.509 authentication. You can read Article to complete this process.Configure Juniper SSG firewall
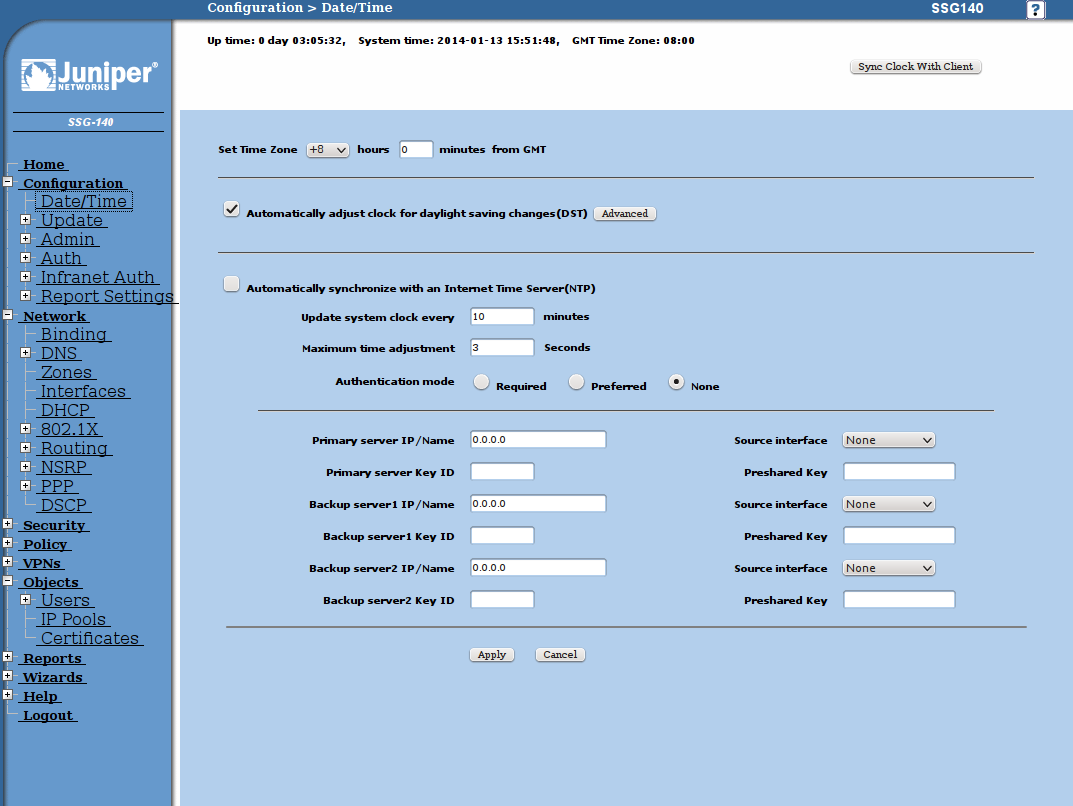
Setup date and time
Using X.509 authentication requires time and date are set correctly on all devices.Time and date configuration for Juniper SSG can be found under Configuration => Date/Time. You can simply click Sync Clock With Client or point the SSG to an NTP server.

Prepare Local Certificates
Goto Objects => Certificates to begin:- Click on New button to create local key and certificate request.

- Click Generate and you will get the PEM encoded certificate request. Click Save To File and send this request to your certificate authority for signing.

- After receiving the signed certificate from your CA, you must install it via the Web UI. Your local certificate status should now become Active.
- Install your CA certificate.
Configure IPSEC VPN Profile
Goto Wizards => Route Based VPN to begin:- Select local and remote interfaces.

- Bind the tunnel to untrust interface.

- Select LAN to LAN tunnel.

- Select Local Static IP <-> Remote Static IP

- Enter remote IP address of Peplink

- Select 128 bit encryption

- Specify the local and remote networks of the IPSEC VPN

- Pass all protocols over VPN in both directions

- Set logging options as needed

- Set Schedule to None

- Click Next then Finish to complete VPN configuration.

Modify IPSEC VPN configuration to use X.509 certificates
- Goto VPNs => AutoKey IKE

- Click Proxy ID and add a new entry as below, otherwise all traffic will be blocked between IPsec peers.

- Then goto Edit and click Advanced. Set the Phase 2 proposal to “g2-esp-aes128-sha” to match the example settings.

-
Go to VPNs => AutoKey Advanced => Gateway Click Edit then Advanced. Set the Phase 1 Proposal as follows. Select the previously imported local and CA certificates. Check Use Distinguished Name for Peer ID. For this example will will only match against the email address set within the Peplink certificate
-

Configure IPSEC Profile on Peplink device
- Goto Network -> Interfaces -> IPSEC VPN to create a new IPSEC profile. Give the VPN a meaningful Name and enter the Remote Gateway IP and Remote Networks of the Juniper SSG. Set Authentication to X.509 Certificate and paste the Juniper SSG cerficate into Remote Certificate. Select the matching Phase 1 and Phase 2 settings for VPN.

- Click Save and the IPSEC configuration is now complete.