Using Virtual Machine Manager to create a virtual machine with USB storage
Virtual Machine Manager (can be downloaded here) is a desktop user interface for managing KVM virtual machines through libvirt. It presents a summary view of running domains, their live performance & resource utilization statistics. Wizards enable the creation of new domains and the configuration & adjustment of a domain’s resource allocation & virtual hardware.
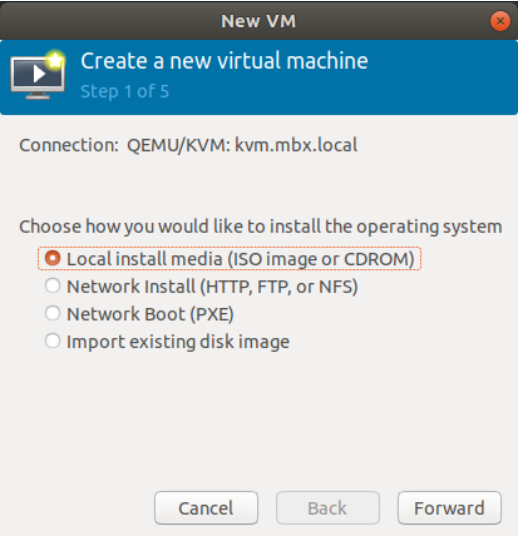
The wizard provides the following methods to install the operating system in the new virtual machine:
- Local install media (ISO image or CDROM)
- Network Install (HTTP, FTP, or NFS)
- Network Boot (PXE)
- Import existing disk image
Upload ISO or disk image to the MBX:
To upload an ISO or disk image to the MBX, navigate to “Advanced” > “KVM”, and open the file manager from the link “Click here to open file manager”.

Below are the steps for creating a Virtual Machine from an ISO image:
-
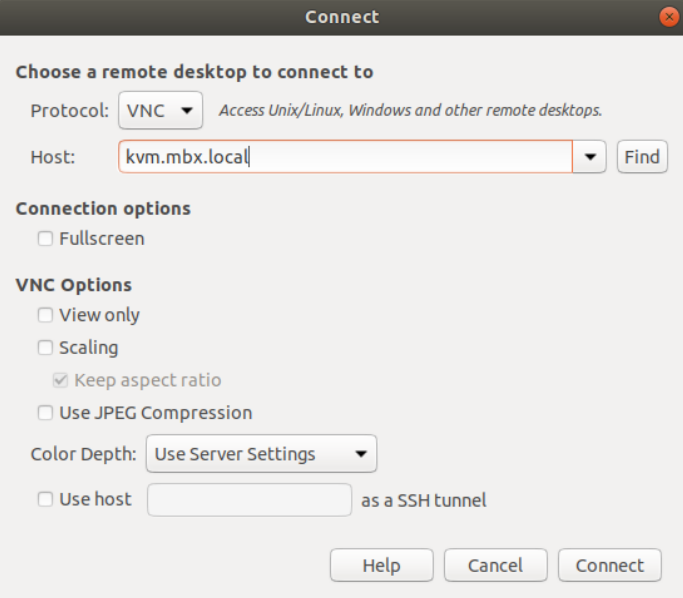
Open Virtual Machine Manager on the local PC (eg. Linux OS such as Ubuntu, Fedora, etc). Select “File → Add Connection…” and a dialog will appear. Configure the settings as below and click “Connect” to access the Peplink router KVM Console. The Username is the Web Admin / Username, and the Hostname could be hostname or the IP of the Peplink device:

-
Input username and password for authentication. These are the same credentials as the device’s Web Admin login credentials, eg. User ID: root, Password: Abc@123456.

-
After establishing a connection, a summary view of the VMs that are installed on the device will be displayed, as shown below. You can also start or shutdown any VM while in this view.

-
Go to “File → New Virtual Machine” in the menu bar and the dialog below will appear. Select “Local install media (ISO image or CDROM)” and click “Forward”.
-
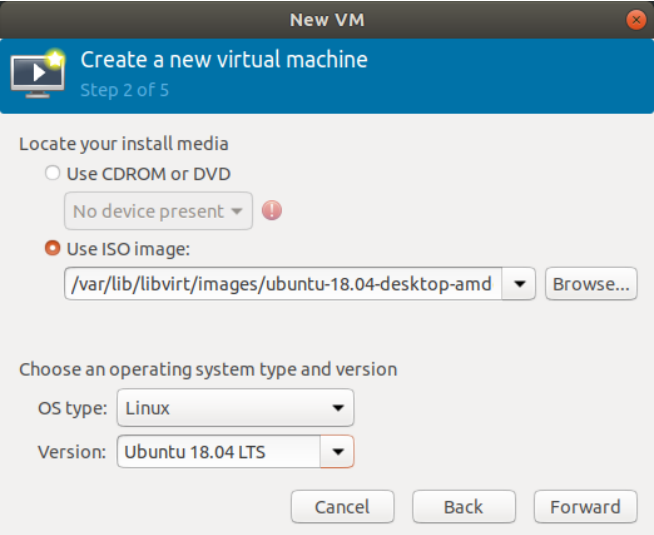
Browse and select the uploaded ISO image and click “Forward”.
-
Specify the RAM size and the number of CPUs to be allocated to the VM and click “Forward”.
-
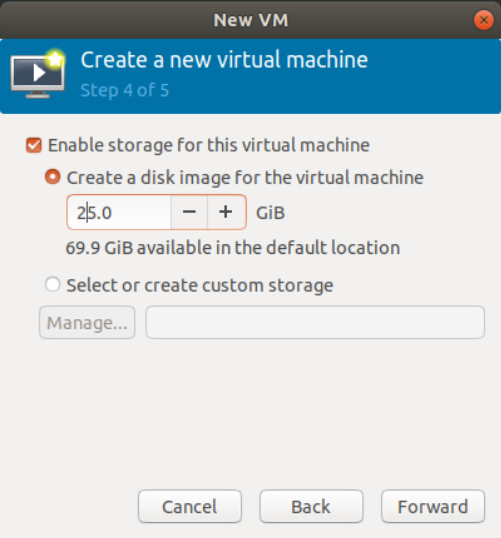
Specify the storage size for the VM and click “Forward”.
-
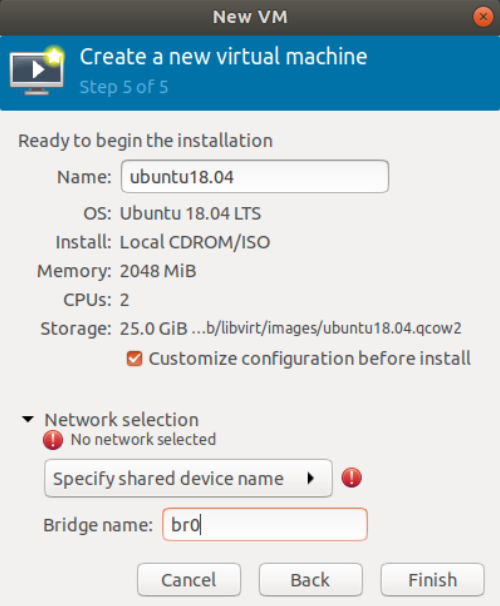
Specify the name of the VM. Ensure that the “Customize configuration before install” checkbox is checked and specify “br0” in the “Bridge name” as shown below. Click “Finish”.
-
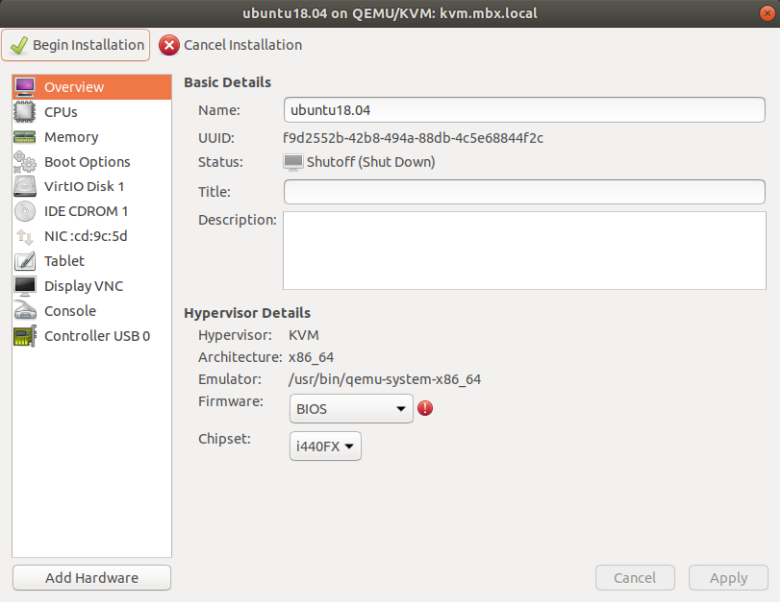
A VM configuration dialog will appear as shown below.
-
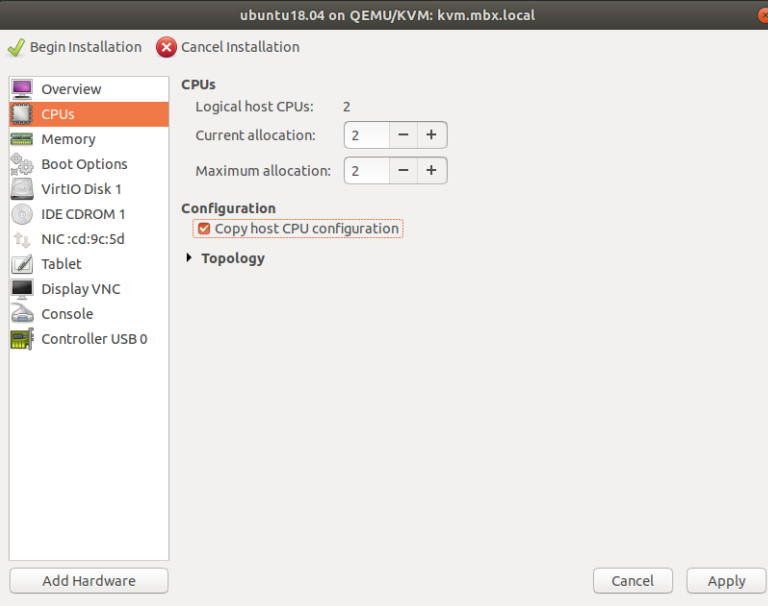
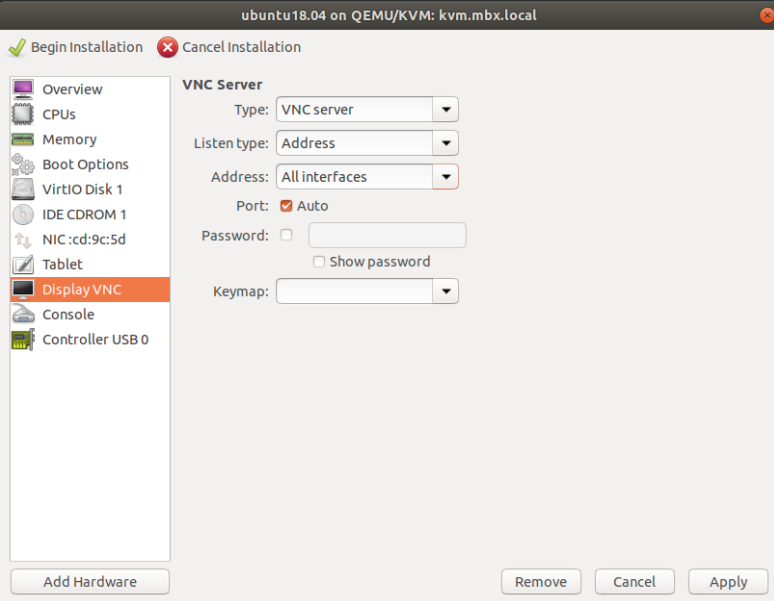
Modify the hardware configuration:

- Select “Copy host CPU configuration” under “CPUs” as shown below.
- Select “Display VNC”, and follow the settings as shown below.
-
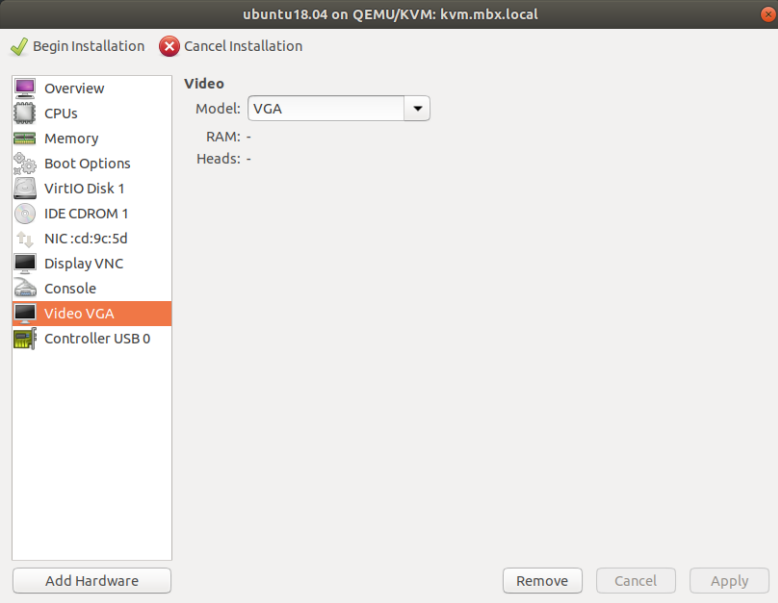
Click “Add Hardware” to add “Video VGA”. Remove “Tablet”. The final hardware configuration is shown below. Click “Begin Installation” to start the installation.
-
Open a VNC viewer and connect to the device as shown below:
-
A console will appear. Complete the installation here.
-
When the installation is completed, the newly created VM will appear in the summary view as shown below.:


In order to add USB storage to the Virtual Machine:
-
Insert the formatted USB disk to the USB1 port on the MBX.
-
Open the virtual hardware details dialog:
-
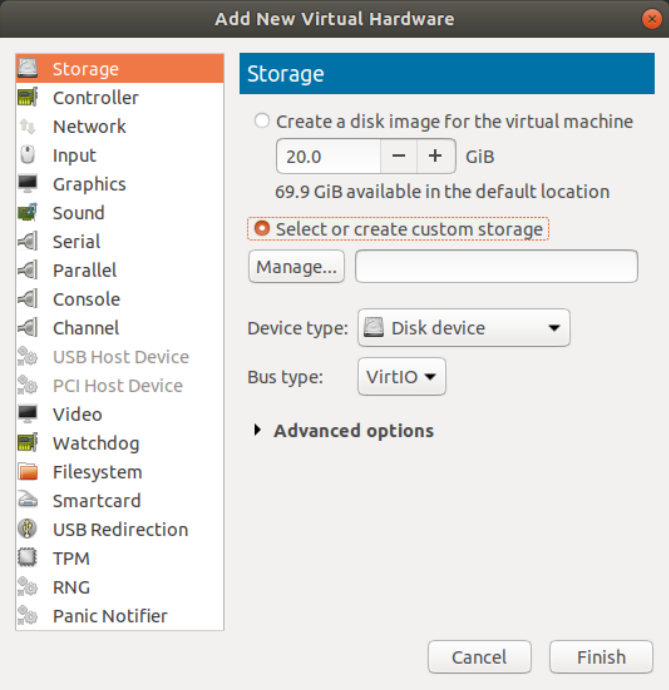
To add the USB storage, click “Add Hardware”. Then, select “Storage” from the column on the left. Click on “Select or create custom storage” and then the “Manage…” button.
-
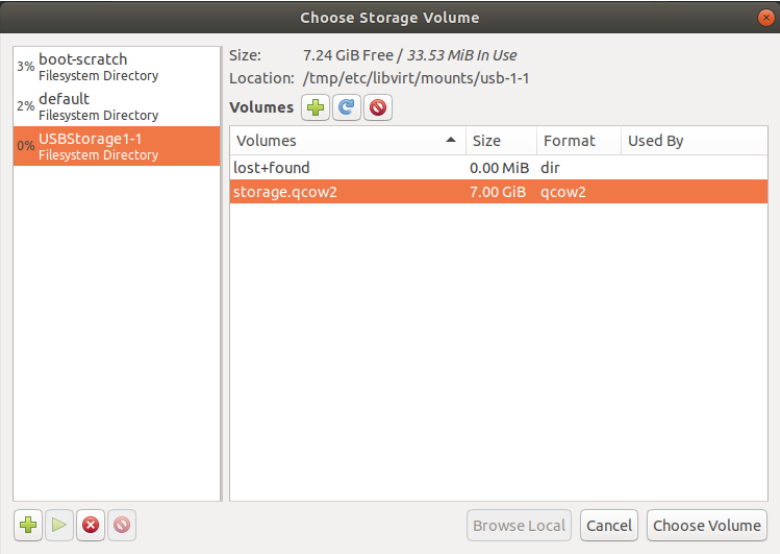
In the left-hand column, select the storage pool called “USBStorage1-1” for the USB disk. In the right-hand column, select the desired volume and click “Choose Volume”. If there is no volume in the disk, you can click the “+” button to create one.
-
Change “Bus type” to USB as shown below and click the “Finish” button.
-
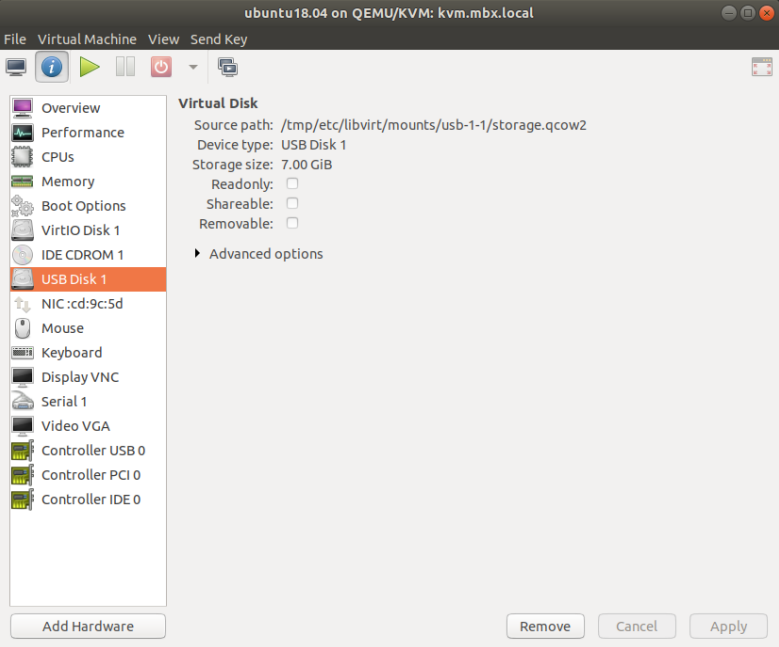
“USB Disk 1” has been created for the virtual machine:
-
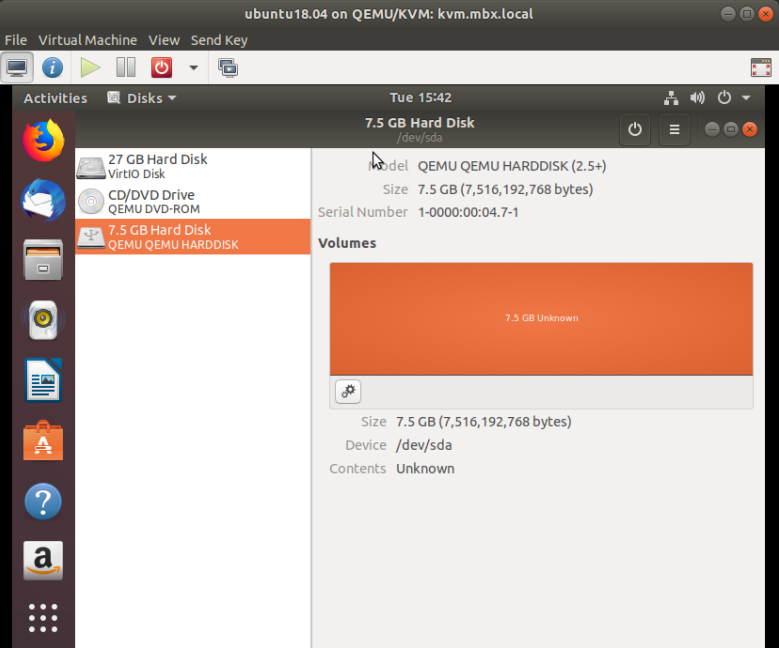
Power on the virtual machine and “/dev/sda” is now ready for use.


NOTE:
This feature is only applicable to higher-end models with more powerful CPUs and larger storages, e.g. MFA500, MFA750, and X-series routers with storage options.
This is officially supported on Firmware 8.1.0 or higher…