AWS Transit Gateway Connect Support

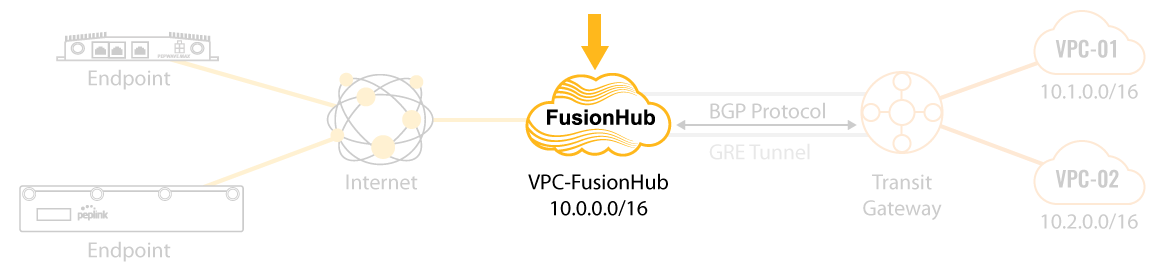
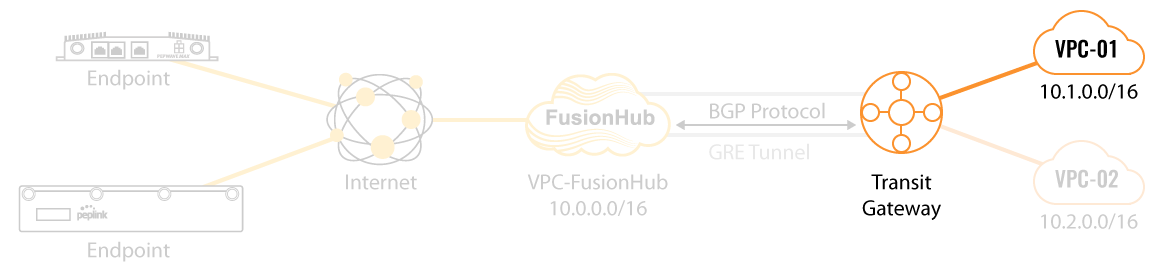
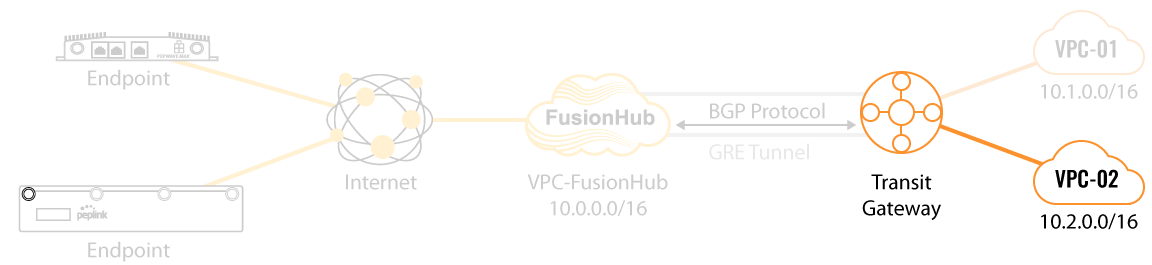
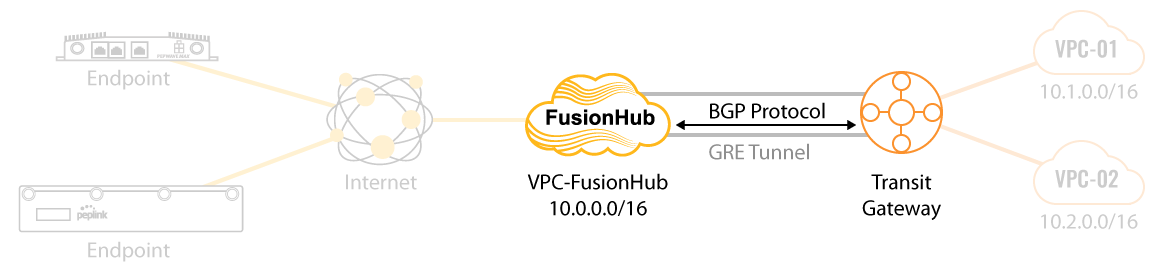
This guide walks you through the process of connecting your SpeedFusion network to an AWS Transit Gateway Connect. Here is the network we’ll be setting up:

Transit Gateway FHB

This guide assumes you have already established the VPCs. For easier viewing, click any image to see a full-sized version.

1) Create FusionHub Instance & Install Latest Firmware (8.1.3 or above)

Transit Gateway FHB 6

Set up the FusionHub instance inside the FusionHub VPC. During creating the FusionHub, manually fill in the Primary IP under Network Interface. In this example, we are using 10.0.0.10 as FusionHub IP.

Create FusionHub

After created the FusionHub, upgrade with Latest firmware.

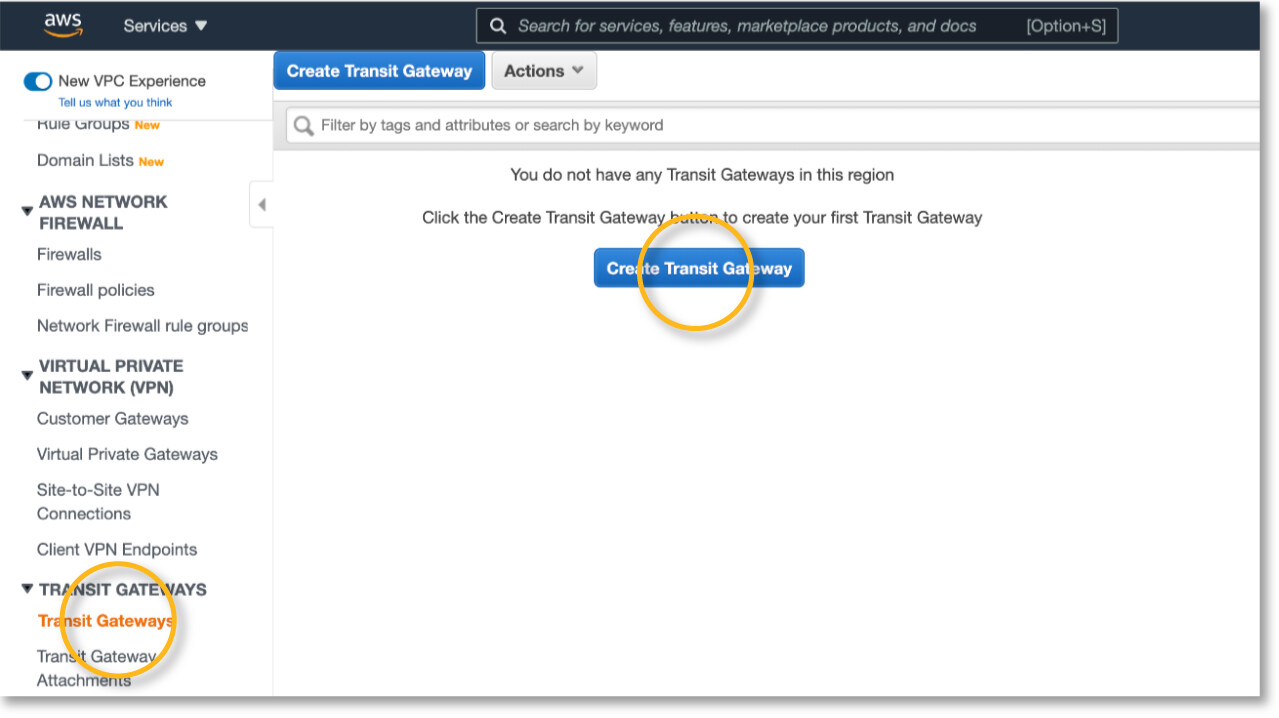
2) Create Transit Gateway and Attachments

Go to the AWS Console, navigate to VPC > TRANSIT GATEWAYS > Transit Gateway and click Create Transit Gateway

step 1

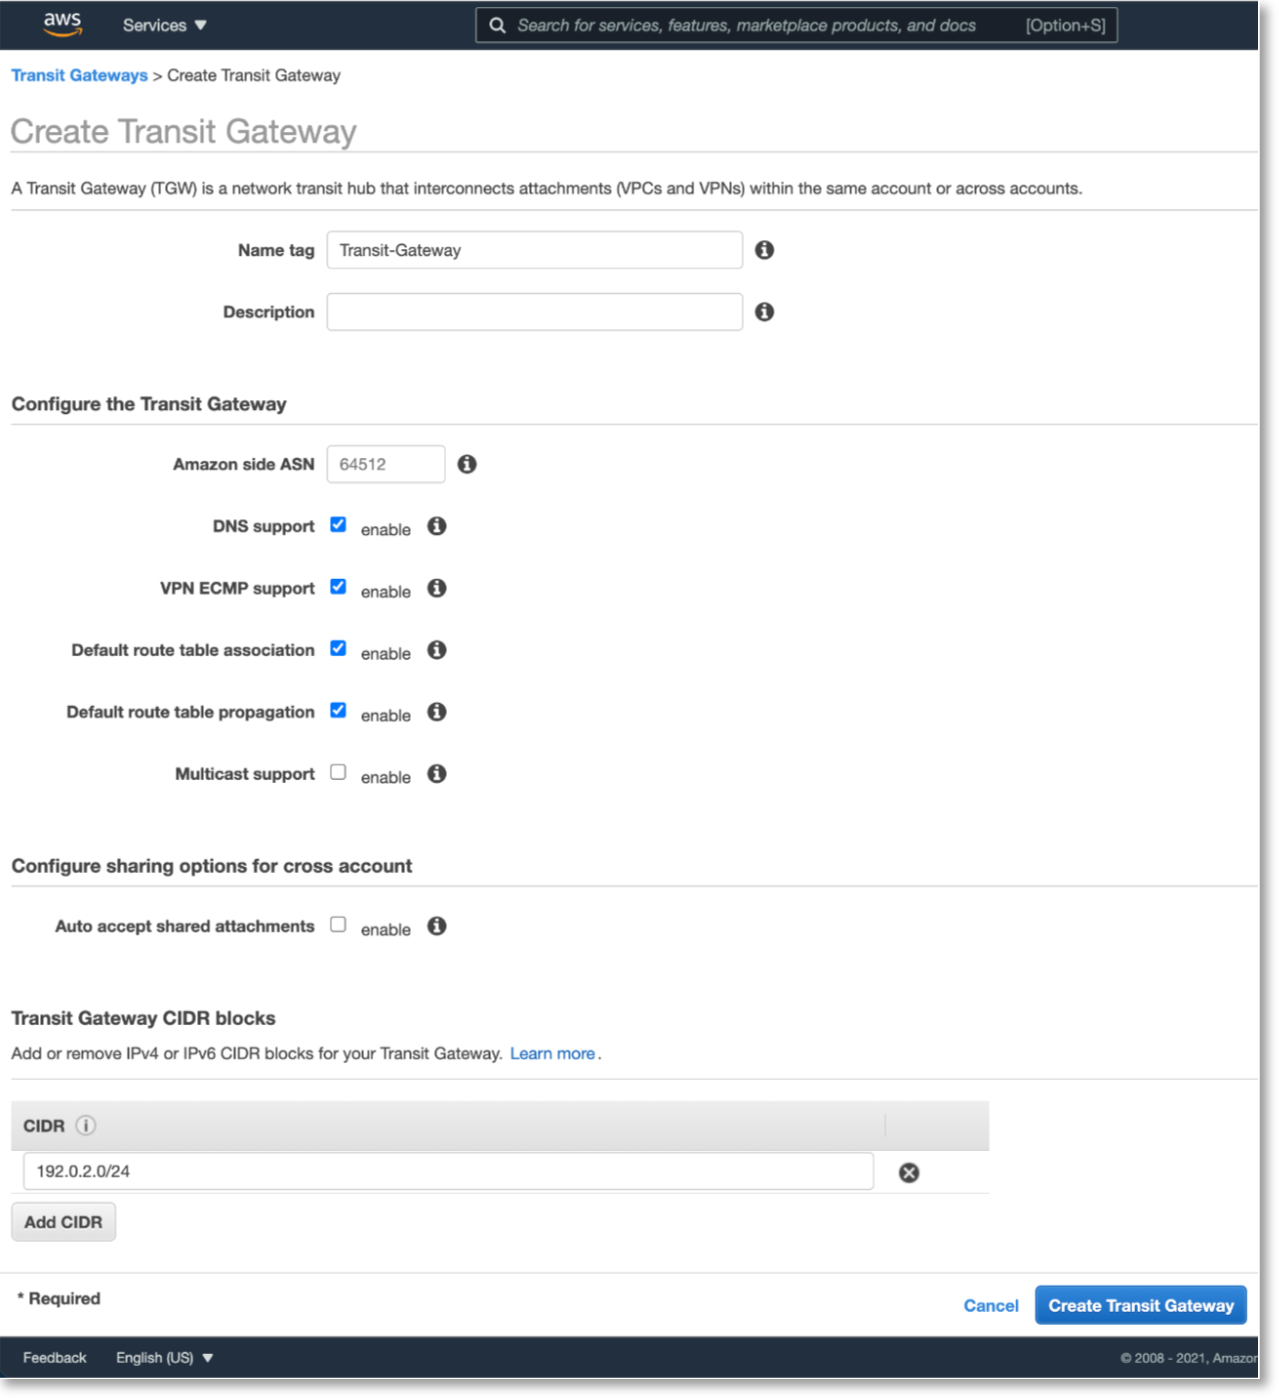
Name and configure your Transit Gateway, and then click Create Transit Gateway.

step 2

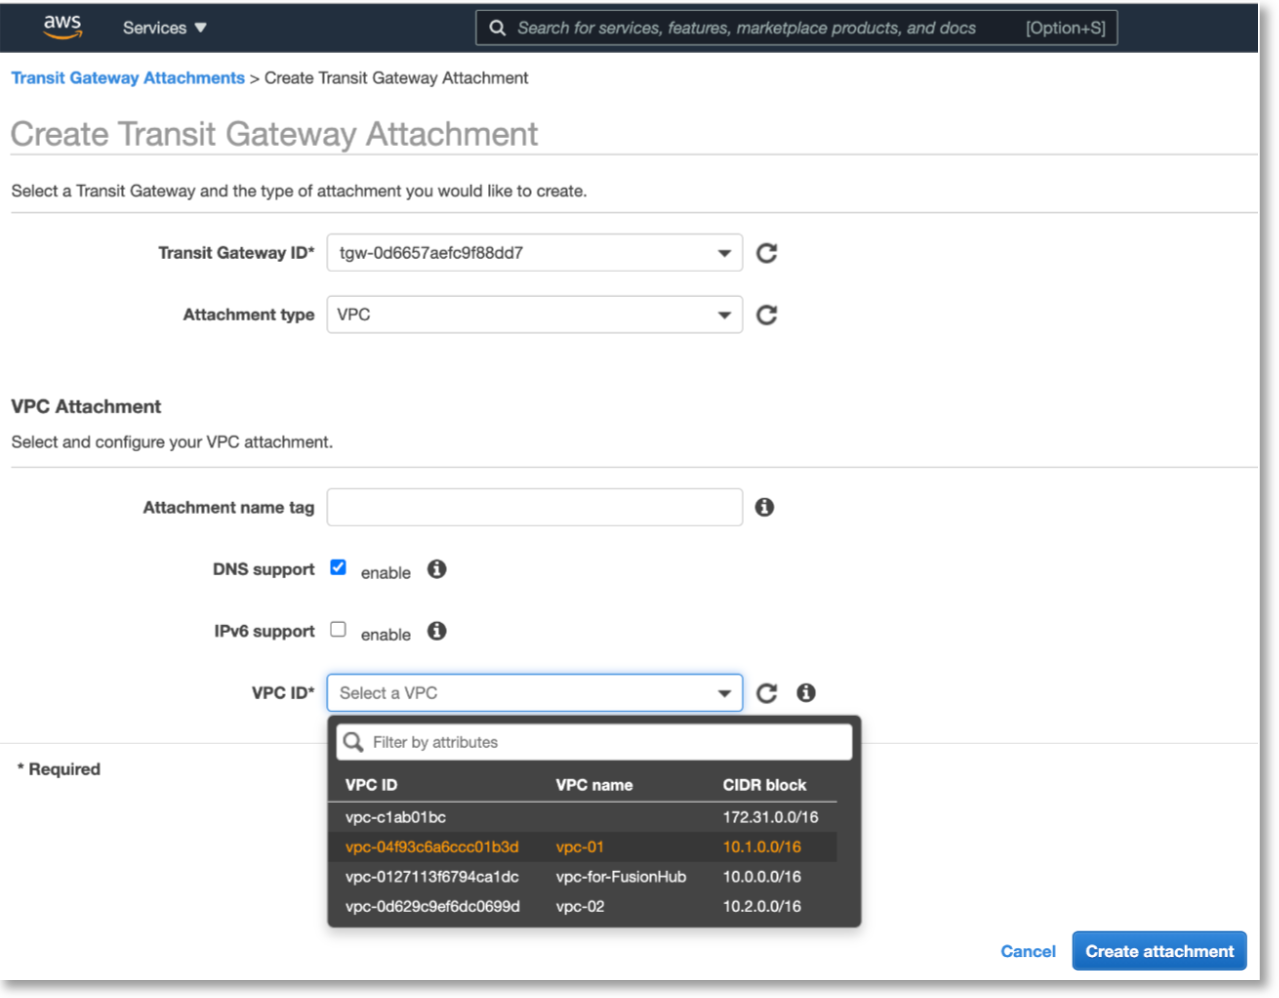
Then navigate to “TRANSIT GATEWAYS > Transit Gateway Attachments” and click Create Transit Gateway Attachment.

step 3

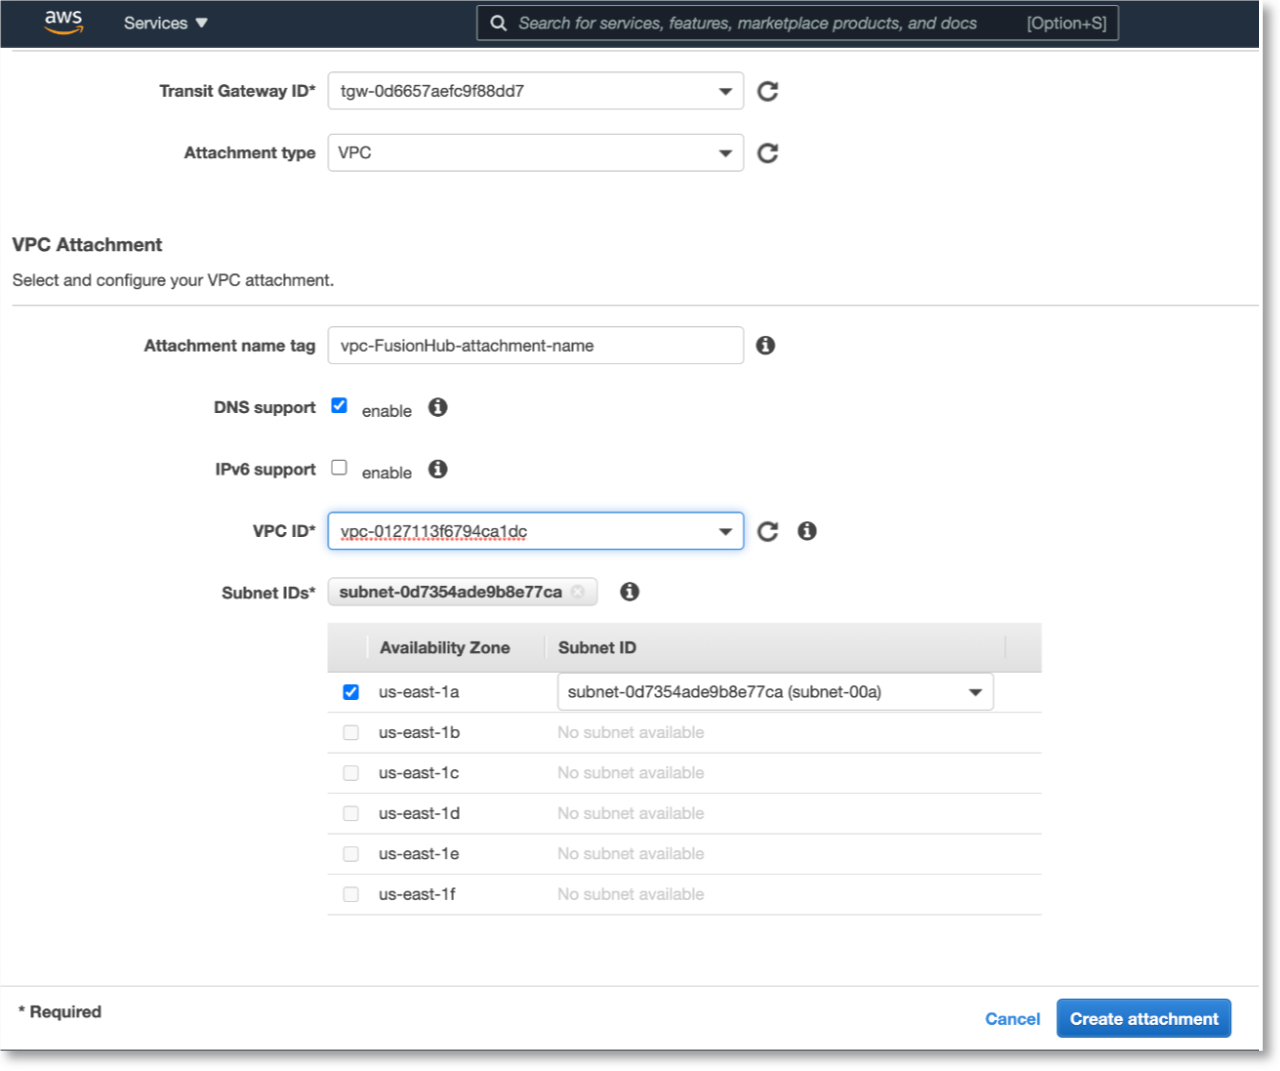
The Create Transit Gateway Attachment page will appear. From the Transit Gateway ID dropdown menu, select your new Transit Gateway. For the Attachment type, select VPC. Your VPCs will appear under VPC ID.

step 4

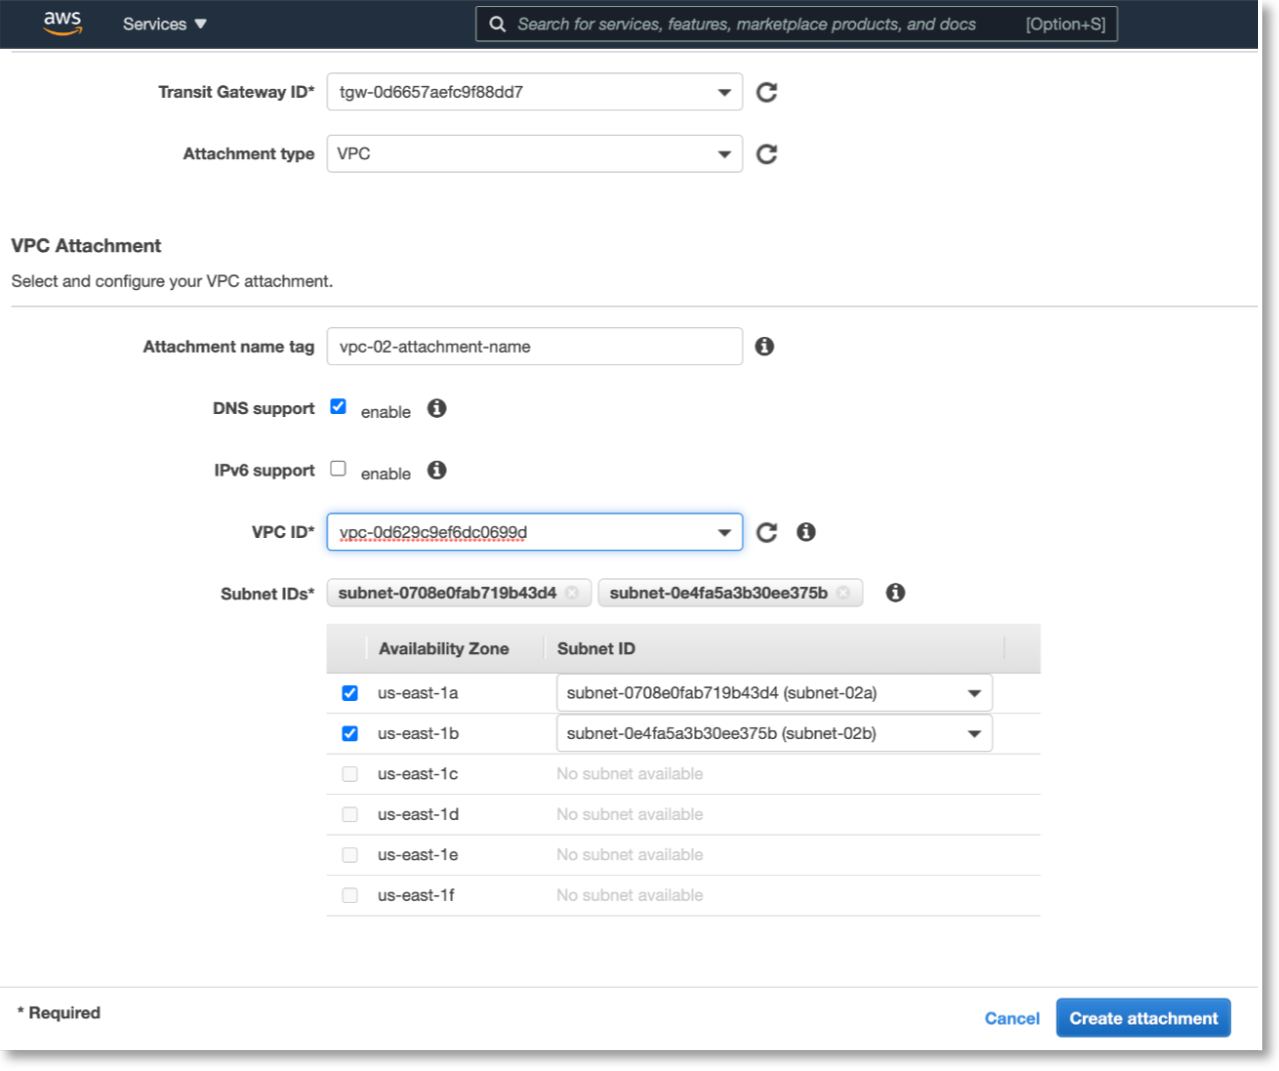
Under VPC Attachment > VPC ID, select the IDs of each VPC and select the subnets for each of them to operate in.

Transit Gateway FHB 3

step 5

Transit Gateway FHB 4

step 5b

Transit Gateway FHB 2

step 5c

3) Connect the Transit Gateway to the FusionHub VPC

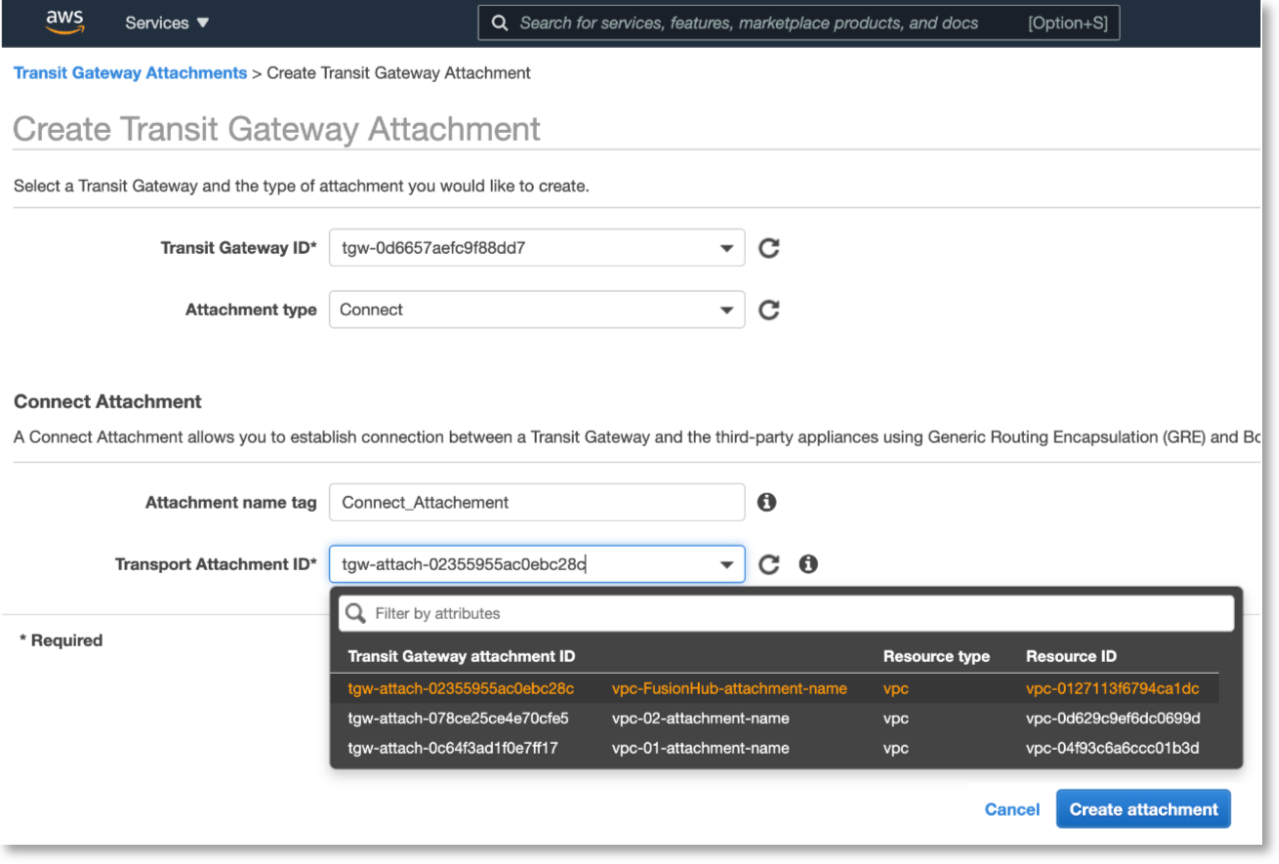
Next, create another Transit Gateway Attachment, this time with Connect as the attachment type. For the Transport Attachment ID, set it to vpc-FusionHub.

step 6

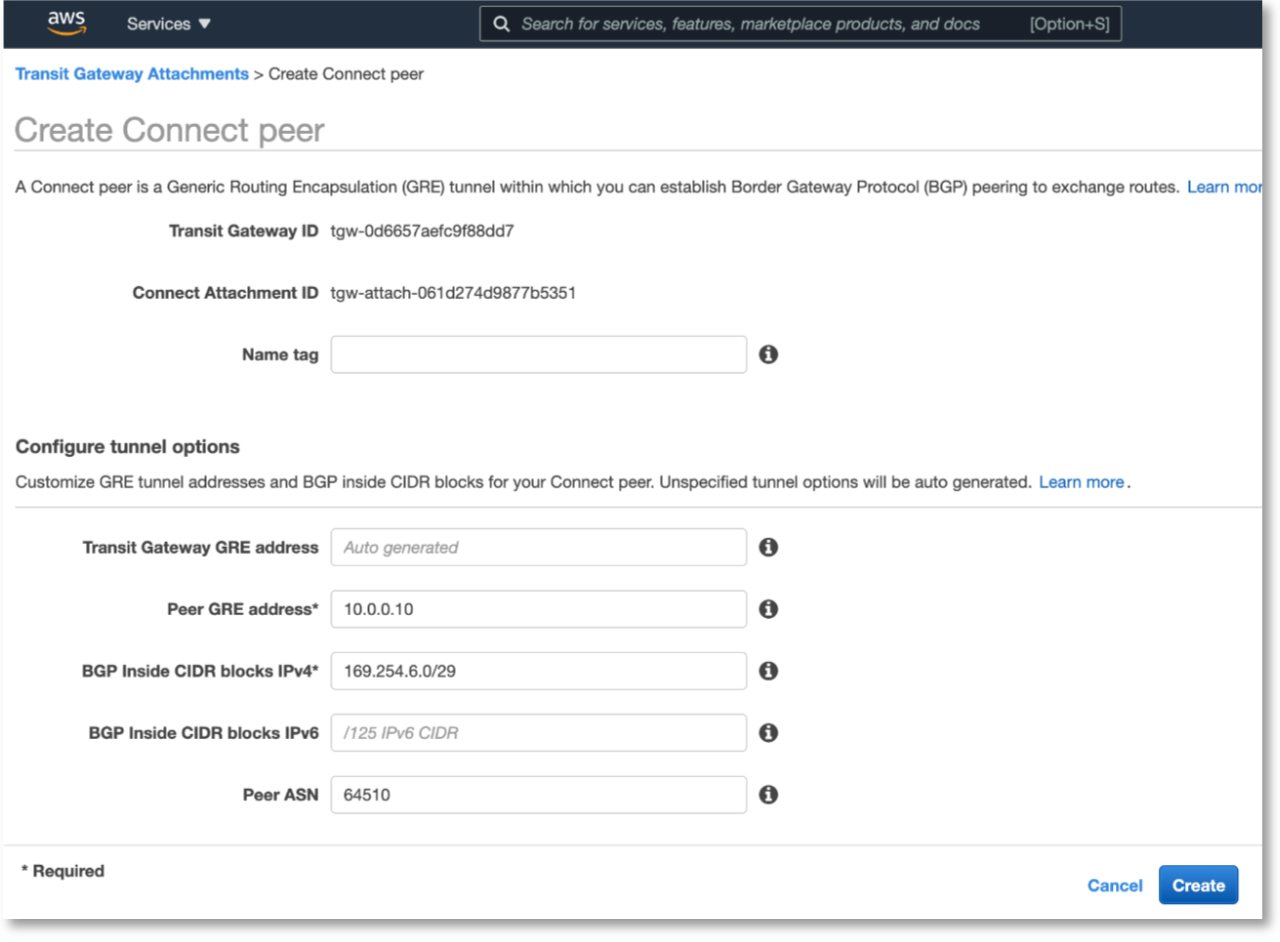
Return to TRANSIT GATEWAY > Transit Gateway Attachments, select the Connect type attachment you have just created, and on the table below, navigate to the Connect peers tab, and then click Create Connect peer

step 7

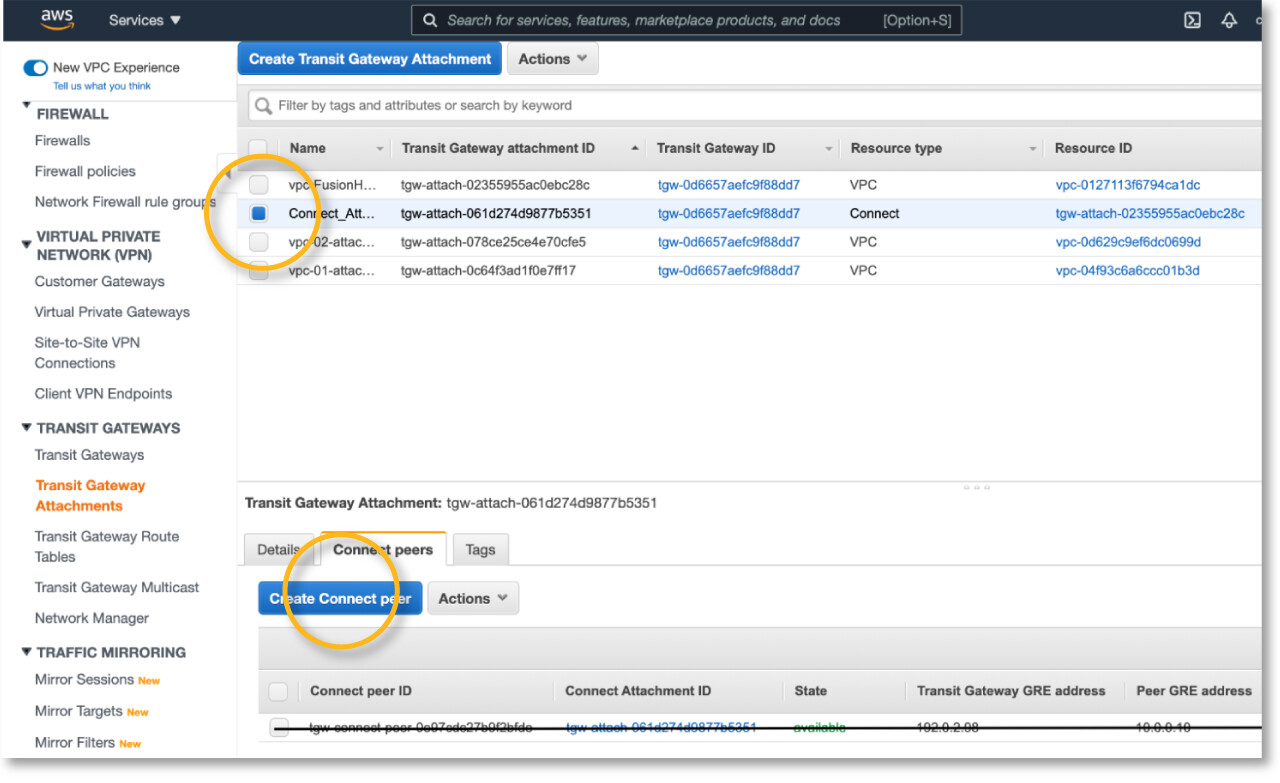
The Create Connect peer page will pop up with some info already filled. Enter the remaining information. Please fill in FusionHub LAN IP address as Peer GRE address, in this example, FusionHub IP is 10.0.0.10

step 8

4) Set Up FusionHub, GRE Tunnel, and BGP

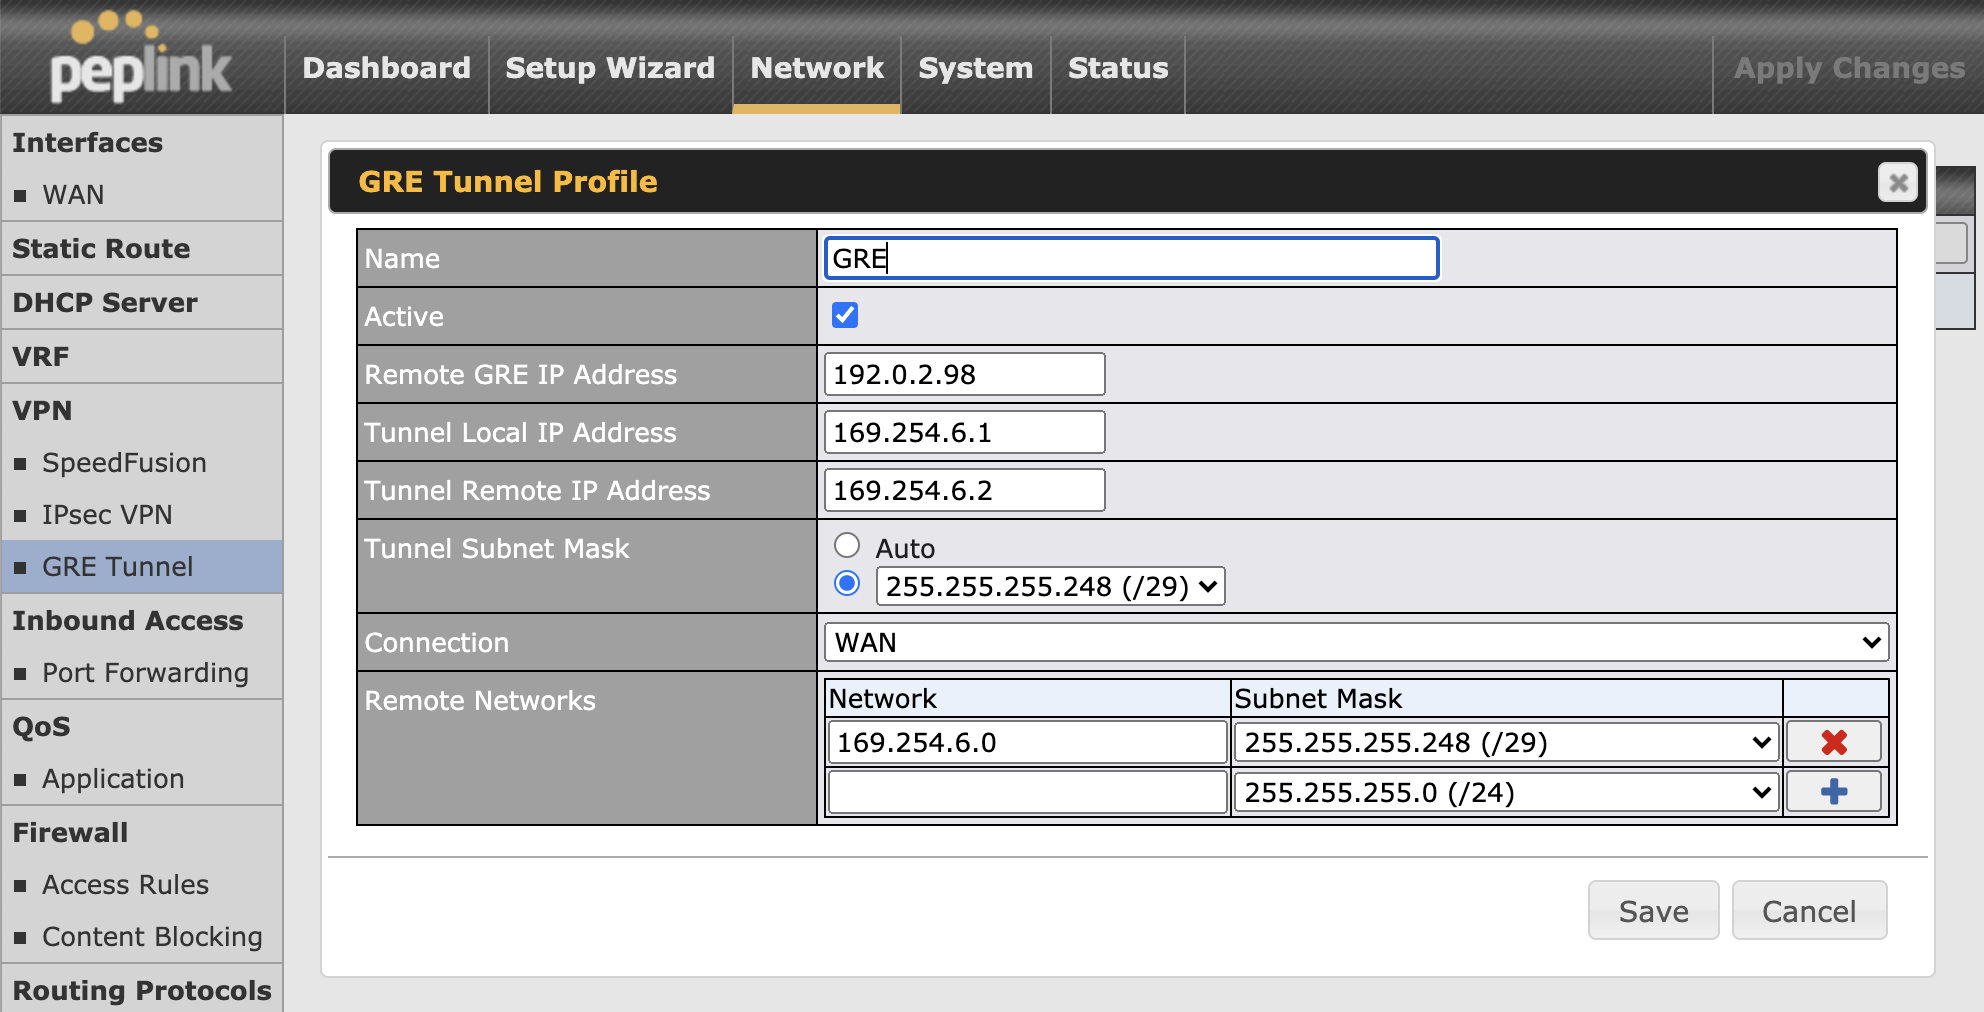
Afterward, head into the FusionHub, set up the GRE Tunnel by navigating to Network > GRE Tunnel, and clicking New Profile

010 Setup GRE on FusionHub 2 - new

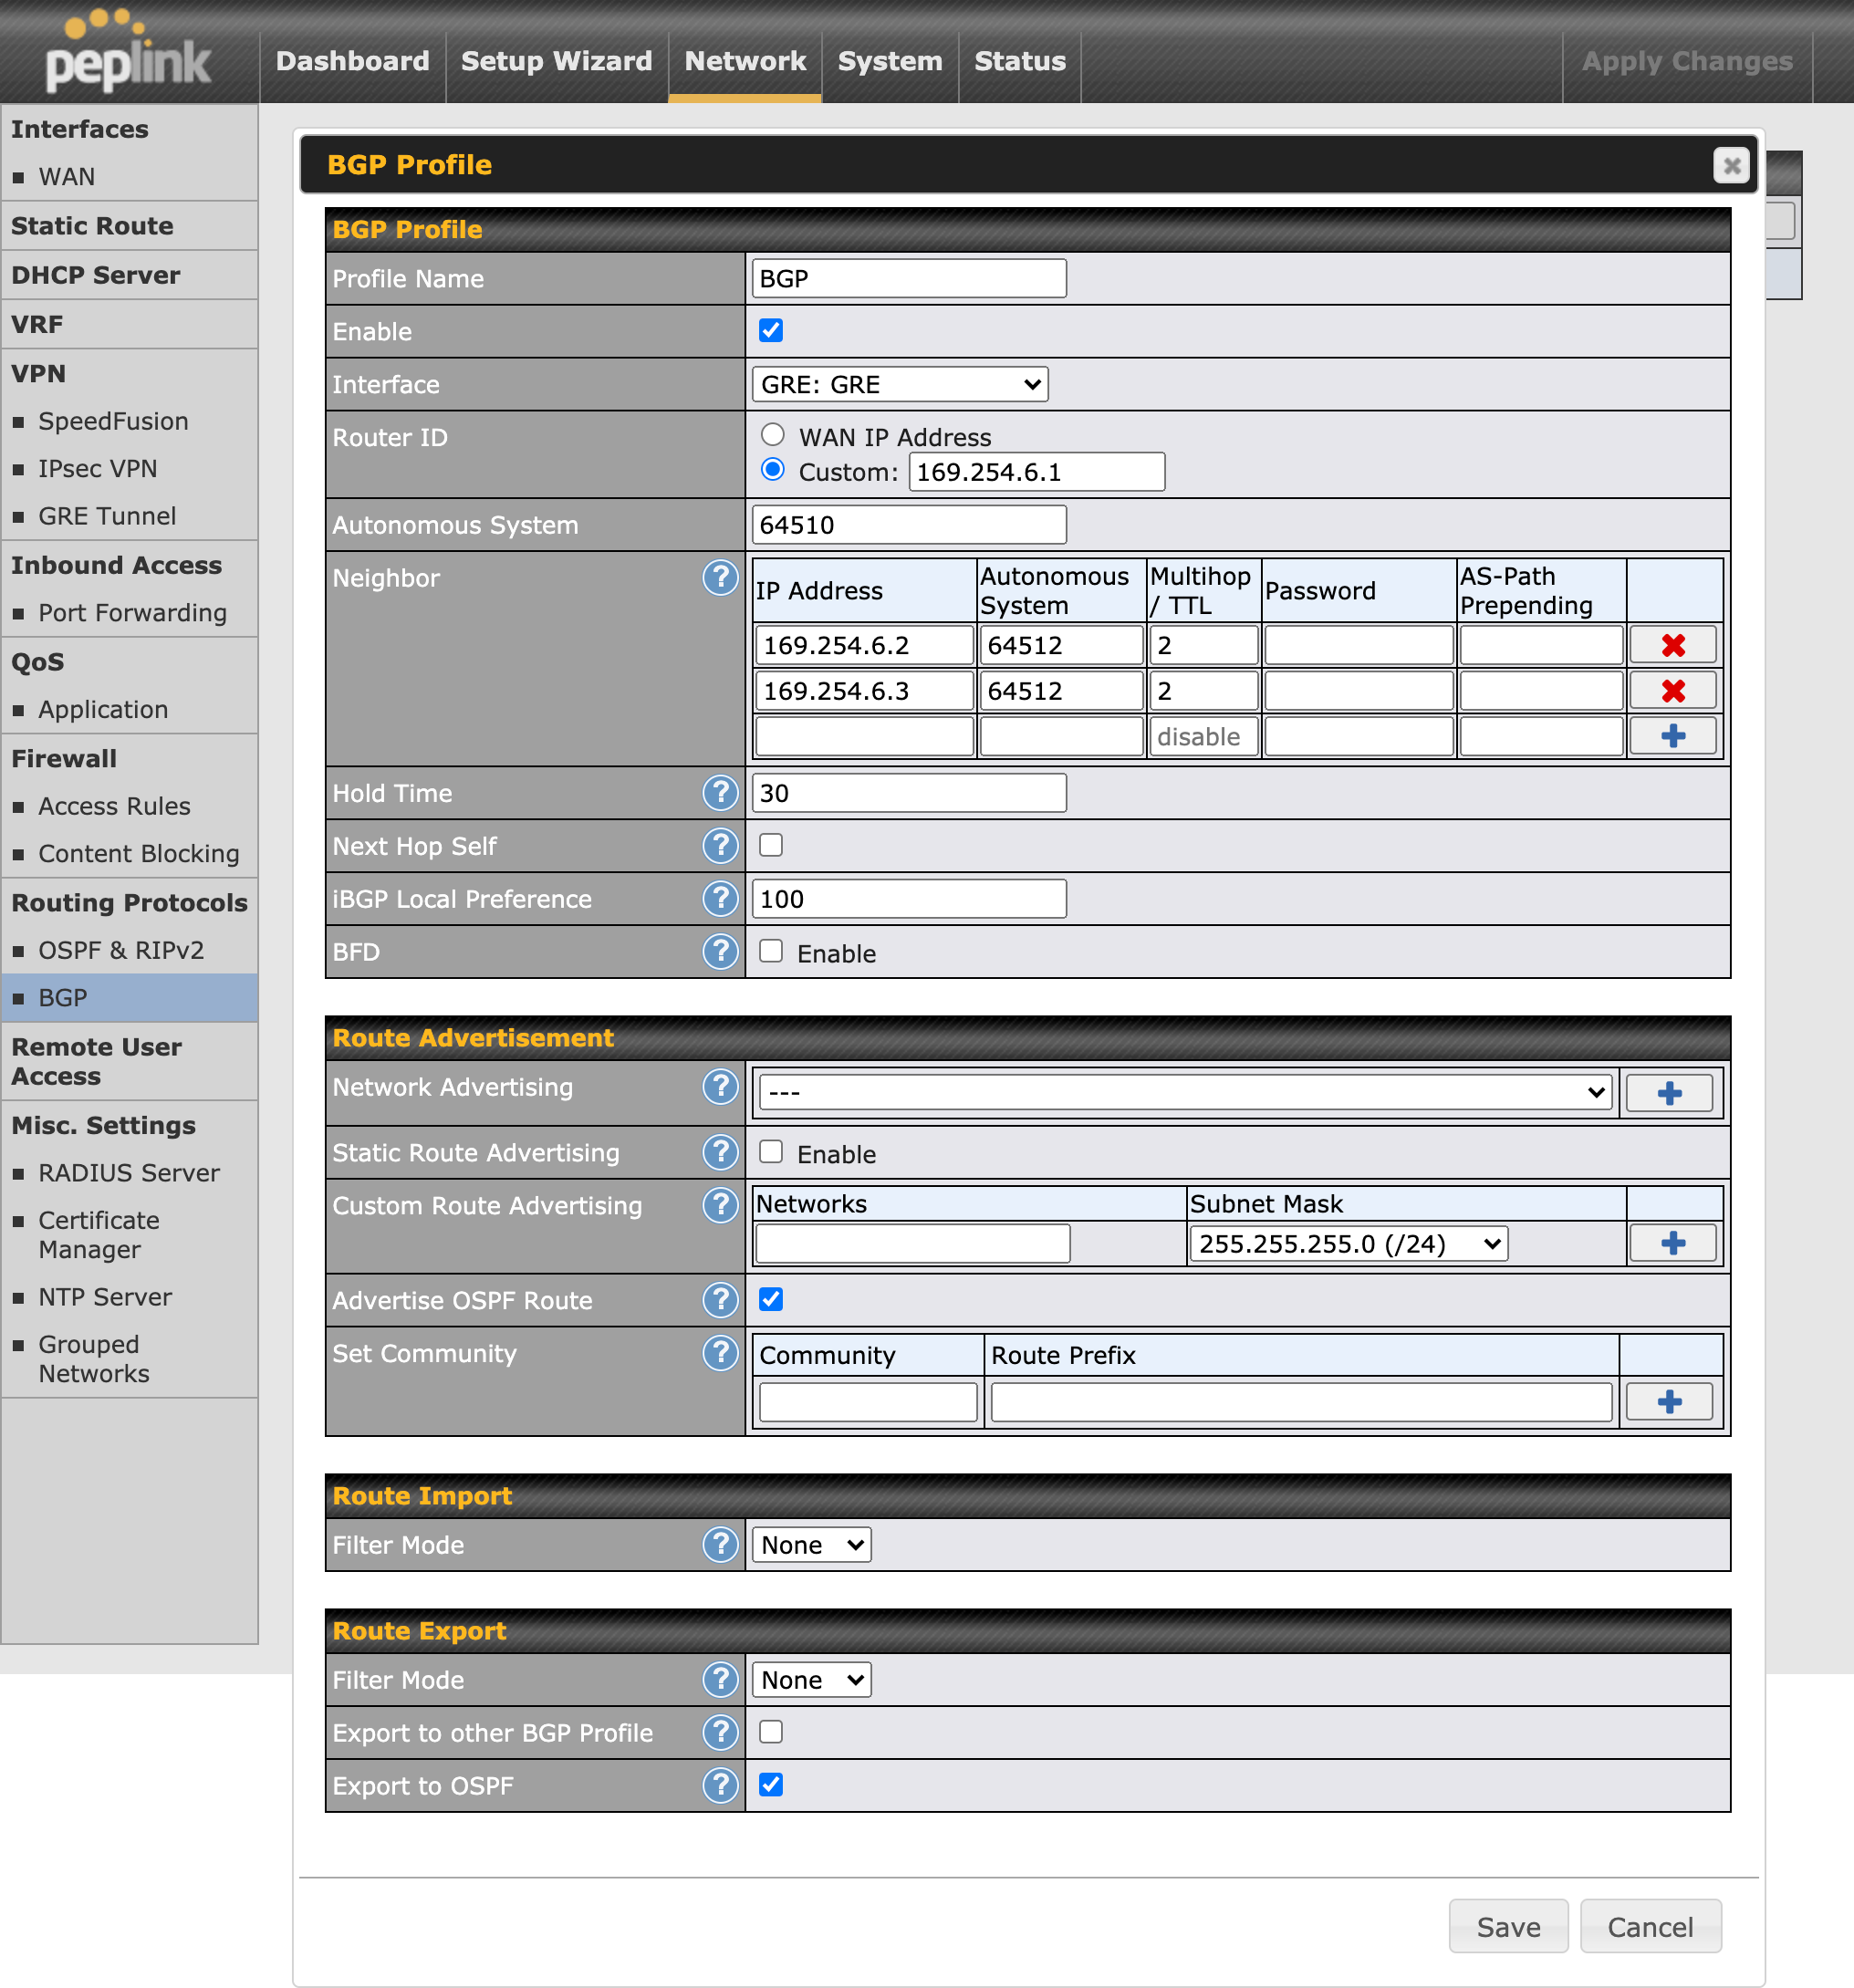
Finally, set up BGP by navigating to Network > BGP, and clicking New Profile

To allow communication between on-premises devices on SpeedFusion and AWS VPC, please enable “Route Advertisement > Advertise OSPF Route” and “Route Export > Export to OSPF”

Setup BGP on FusionHub

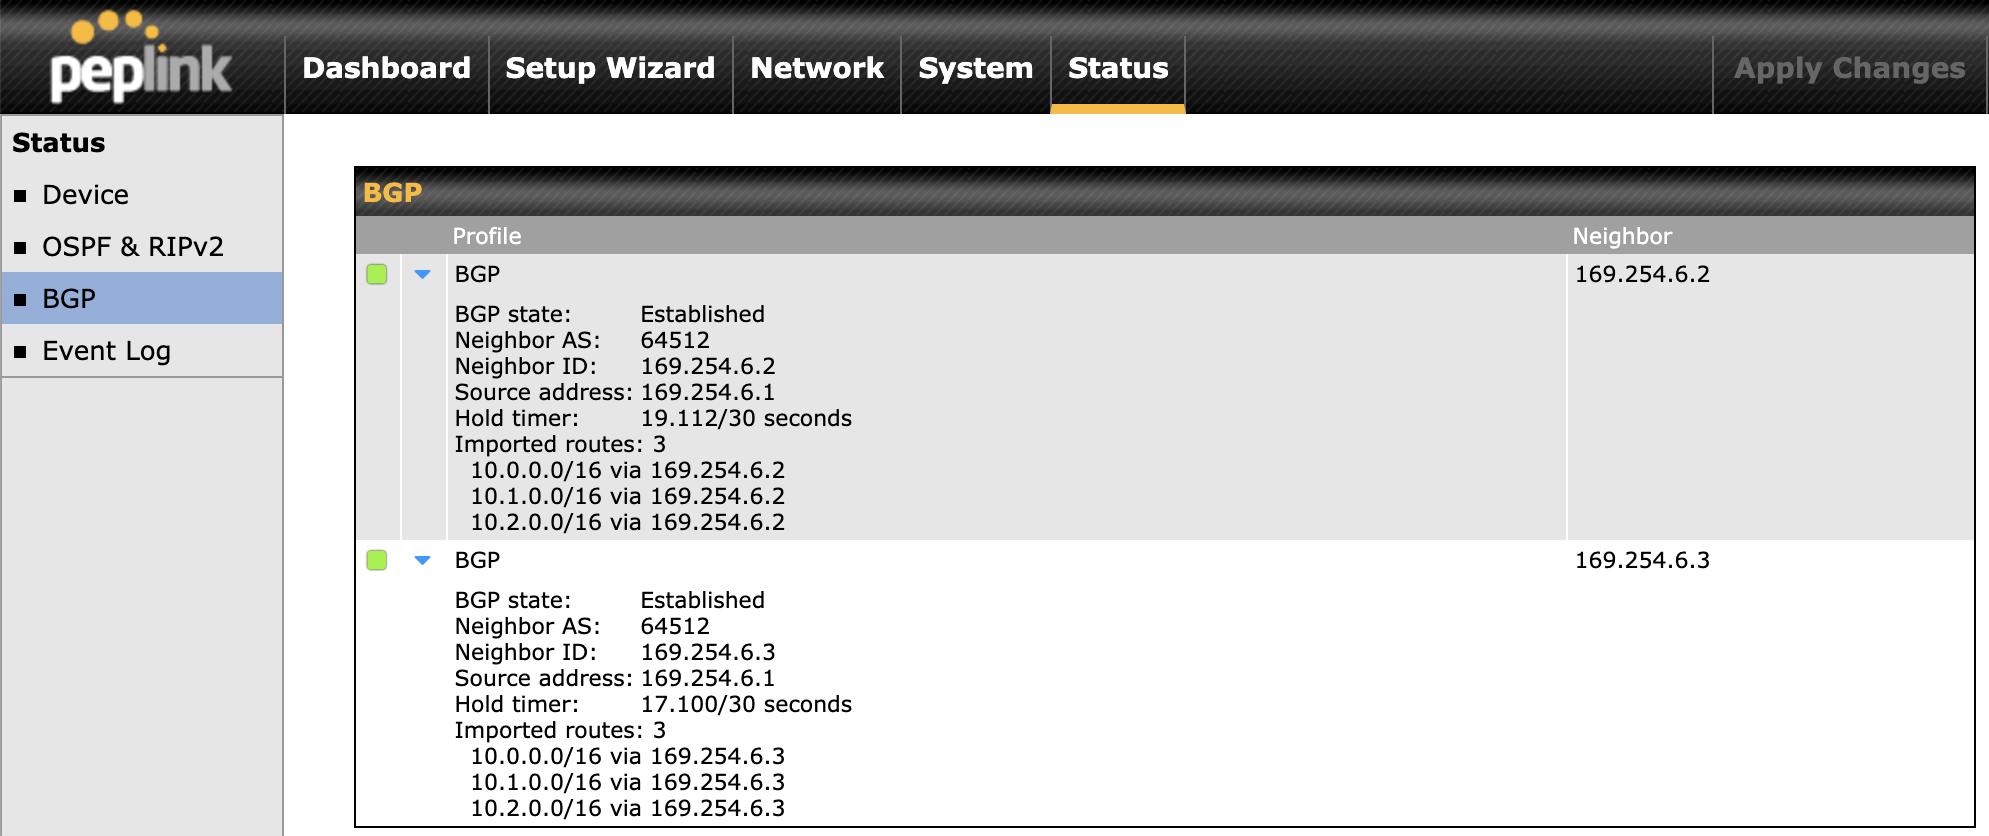
To verify the routes to the other AWS VPC, navigate to Status > BGP

012 Finished - new

6 Likes

I got all the way through this and hit a snag at the very end. I have old and new fusion hubs and none have a BGP option in the networks screen. In fact, the whole routing protocols section is not there. I created a new fusion hub, updated to 8.1.2 build 5005, and still no routing protocol options. What did I miss?

Problem might be right at the beginning:

Step 1: Install Special Firmware for FusionHub

This is actually a special firmware: 8.1.2s065 build5019

1 Like

Yup, that was the issue, I had missed it in the process. I went back through, setting it all up and the GRE tunnel shows Green, but the BGP never connects. I plan to start over tomorrow with a fresh fusionhub instance and see if I can make progress.

I have restarted this over and over now, even built out a vpc to match the addressing schemes used in the guide for the fusion hub to be on so that the GRE tunnel looks like the example. But the BGP connections are not coming up. From both the fusion hub and the AWS side there seems to be no connection. I am running firmware 8.1.2s065 build 5019, the fusion hub WAN ip in NAT mode, by default, and the GRE tunnels show Green status and BGP seems stuck in connect. What should I check?

1 Like

I’m in the same boat. Clean AWS/Fusionhub environment, tried even using same IP schemes from the guide above and GRE is established, no BGP. Were you able to find anything out?

Not so far, but a bit relieved to know it is not just me. The part of the guide I am not able to wrap my head around is if the GRE tunnel is really up. From the AWS side it seems like it is not, or at least not routing right. I have been testing a vpn off a ASA and that connects, but I have not tried BGP over the ASA yet.

Hello @breeves & @nick.faircloth,
Suggest you submit a support ticket for the Peplink engineers to take a look at for your setups.
Post your ticket #s here and reference this forum thread in your ticket. There may be an update for @Alan to make to the guide.
Happy to Help,
Marcus :slight_smile:

I have reached out to support as suggested @mldowling. I opened ticket #21070241 and will follow up here on anything that I learn.

3 Likes

Still nothing on my end either and I bumped support last night about it. Have yet to hear anything since last Thursday.

@nick.faircloth I have had a bit of back and forth with Peplink support, but ultimately the solution came from AWS support for the BGP session not connecting. When you create the transit gateway, and that 192.0.2.0/24 subnet there is no automatic routes built. So for the fusionhub vpc, you have to edit the route table and add an entry pointing 192.0.2.0/24 to the transit gateway. As soon as I did that the GRE tunnel actually was able to communicate and the BGP session came up. The final step, which I see was added to the guide above was that in order for the BGP routes to propagate to the VPN peers, you enable the option “Export to OSPF” in the BGP config on the peplink.

5 Likes

All working here now, thank you @breeves !!

2 Likes